
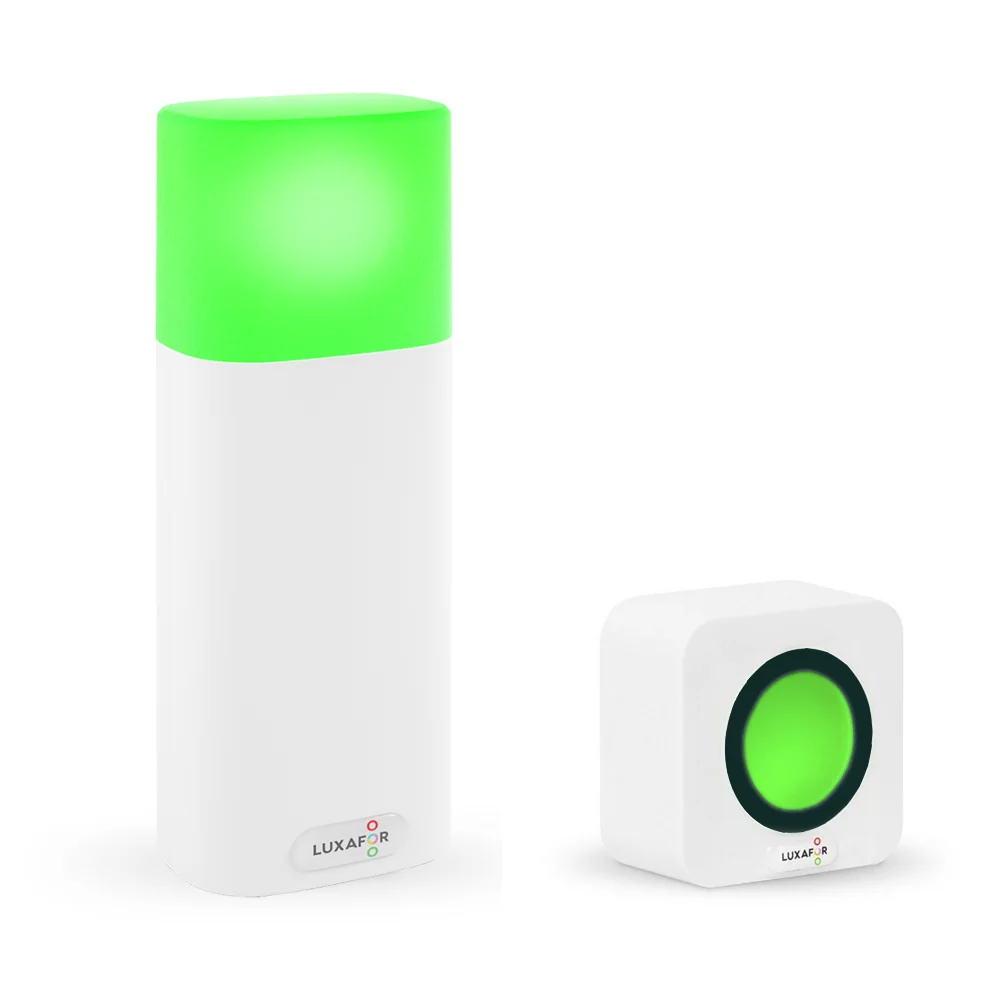
The Luxafor Switch Pro is a wireless busy light you control with a small remote. The light is the Indicator, which has a built-in battery. The remote is the Switch Pro Cube. You turn the Switch Pro Cube onto a different side, and the Indicator changes color, with no computer or app. This manual covers charging, setup, pairing, turning off, Eco Mode, the battery indicator and specifications.
What’s in the box #
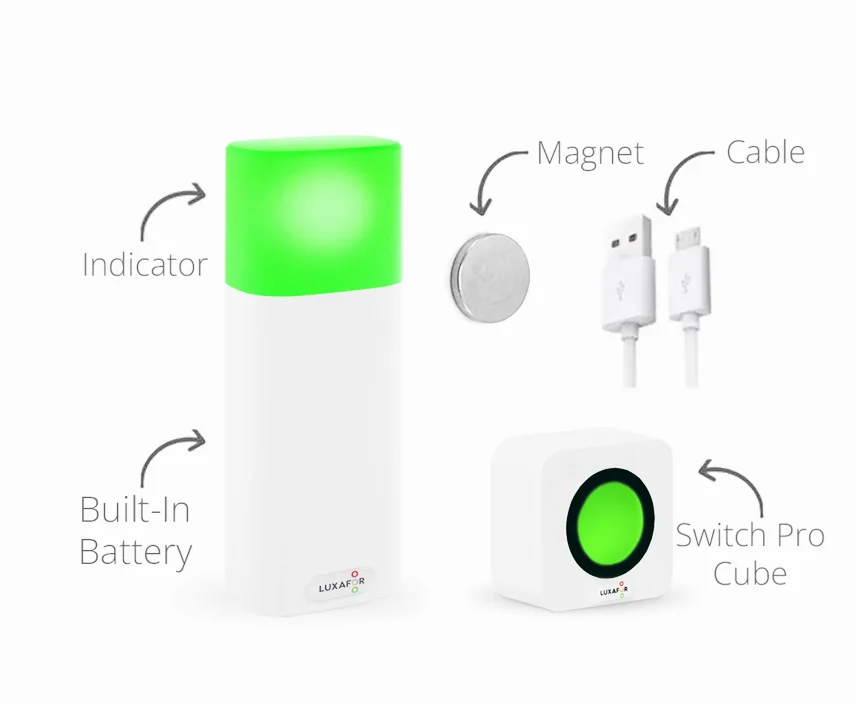
- 1 rechargeable Luxafor Indicator with a built-in battery. This is the light.
- 1 Luxafor Switch Pro Cube. This is the remote.
- 1 USB charging cable
- 1 magnet with double-sided tape
Charge the Indicator and the Switch Pro Cube #
Charge both units fully before the first use.
- Plug the charging cable into a USB wall charger.
- Plug the other end into the charging port on the Indicator or on the Switch Pro Cube.
Indicator #
The light on the Indicator glows red while it charges and turns solid green when it is full. Charging takes about 3 to 5 hours.
Switch Pro Cube #
Charging takes about 2 to 4 hours. The Switch Pro Cube turns on as soon as charging starts. It then shows the battery level. See Check the battery level of the Switch Pro Cube. You can use the Switch Pro Cube while it charges, and it works as usual. If the battery is very low, it may not turn on right away. It charges for a short time first, then turns on and works as usual.
Set up #
- Charge the Indicator and the Switch Pro Cube fully. They then work fully wireless.
- Peel the plastic off the double-sided tape on the magnet. Stick the magnet on the surface where you want the Indicator. Without obstacles, the Bluetooth range is 80 m (250 ft).
- Press the button on the back of the Switch Pro Cube once, briefly, to turn it on.
- The Switch Pro Cube connects to the closest Indicator by itself. A red running pattern shows that it is connecting.
- Turn the Switch Pro Cube onto a different side to change the color of the Indicator.
Stick the magnet only on a smooth, clean surface. A rough, dirty or uneven surface weakens the adhesive, and the Indicator can fall. The warranty does not cover damage from a fall. See the warranty terms.
Connect the Switch Pro Cube to another Indicator #
Press and hold the button on the back of the Switch Pro Cube for 10 seconds. A green running pattern shows that it is searching for an Indicator. It then connects to the closest one.
If the Switch Pro Cube finds no Indicator in 90 seconds, it turns itself off. Press the button on the back to turn it on again, then wait up to 90 seconds for it to find the Indicator.
Turn the Switch Pro Cube off #
Press the button on the back of the Switch Pro Cube once, briefly.
Eco Mode #
Eco Mode makes the batteries last longer.
- Press and hold the button on the back of the Switch Pro Cube.
- Release it when the Switch Pro Cube turns yellow.
In Eco Mode, the Indicator blinks. The Switch Pro Cube shows one steady LED at the bottom, where the case has a small gap. Do the same to turn Eco Mode off.
Check the battery level of the Switch Pro Cube #
Lay the Switch Pro Cube face up. It shows a solid blue color, and the number of LEDs that shine tells you how much battery is left. The Switch Pro Cube also shows the battery level when you turn it on.
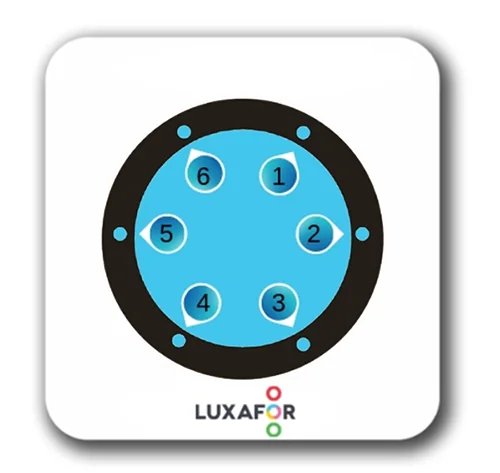
- All 6 LEDs shine: the battery is full. On newer versions, 5 LEDs shine.
- As the battery drains, the LEDs go out one by one. They start with LED 2 and go clockwise.
- Only LED 6 shines: the battery is almost empty. Charge the Switch Pro Cube right away. On newer versions, this is LED 5.
What the lights mean #
| Light | Meaning |
|---|---|
| Green running pattern | The Switch Pro Cube is searching for Indicators nearby |
| Red running pattern | The Switch Pro Cube is connecting to an Indicator |
| Purple running pattern | The Switch Pro Cube has started to connect and is reading the device information and battery level |
| Orange while you hold the button | Release the button and Eco Mode turns on or off |
| Red light on the Indicator while charging | The Indicator is charging |
| Solid green light on the Indicator while charging | The Indicator is full |
Technical specifications #
Indicator with built-in battery #
| Specification | Value |
|---|---|
| Dimensions | 98 × 37 × 22 mm (3.85 × 1.45 × 0.86 in) |
| Weight | 75 g |
| Light | 2 RGB LEDs |
| Power consumption | Up to 80 mA |
| Range | 80 m (250 ft) without obstacles |
| Battery | Built-in, 2600 mAh |
| Battery life | 80 hours to 12 months, depending on brightness and mode |
| Charging | USB-C data cable (included) |
Switch Pro Cube #
| Specification | Value |
|---|---|
| Dimensions | 52 × 52 × 27 mm (2.05 × 2.05 × 1.06 in) |
| Weight | 50 g |
| Light | 6 RGB LEDs |
| Power consumption | Up to 40 mA |
| Battery | Built-in, 1200 mAh |
| Battery life | 57 hours to 8 months, depending on mode |
| Charging | USB-C data cable (included) |
Troubleshooting #
For more help, read Luxafor Switch Troubleshooting.
Still need help? #
Send us a message and tell us:
- which device you have and where you bought it
- what you see, and what you expected to see
- which steps on this page you have already tried
- your order number, if you have one
A short video or photo of the problem helps us fix it faster. If the problem is with the connection, film the Switch Pro Cube and the Indicator while they try to connect.