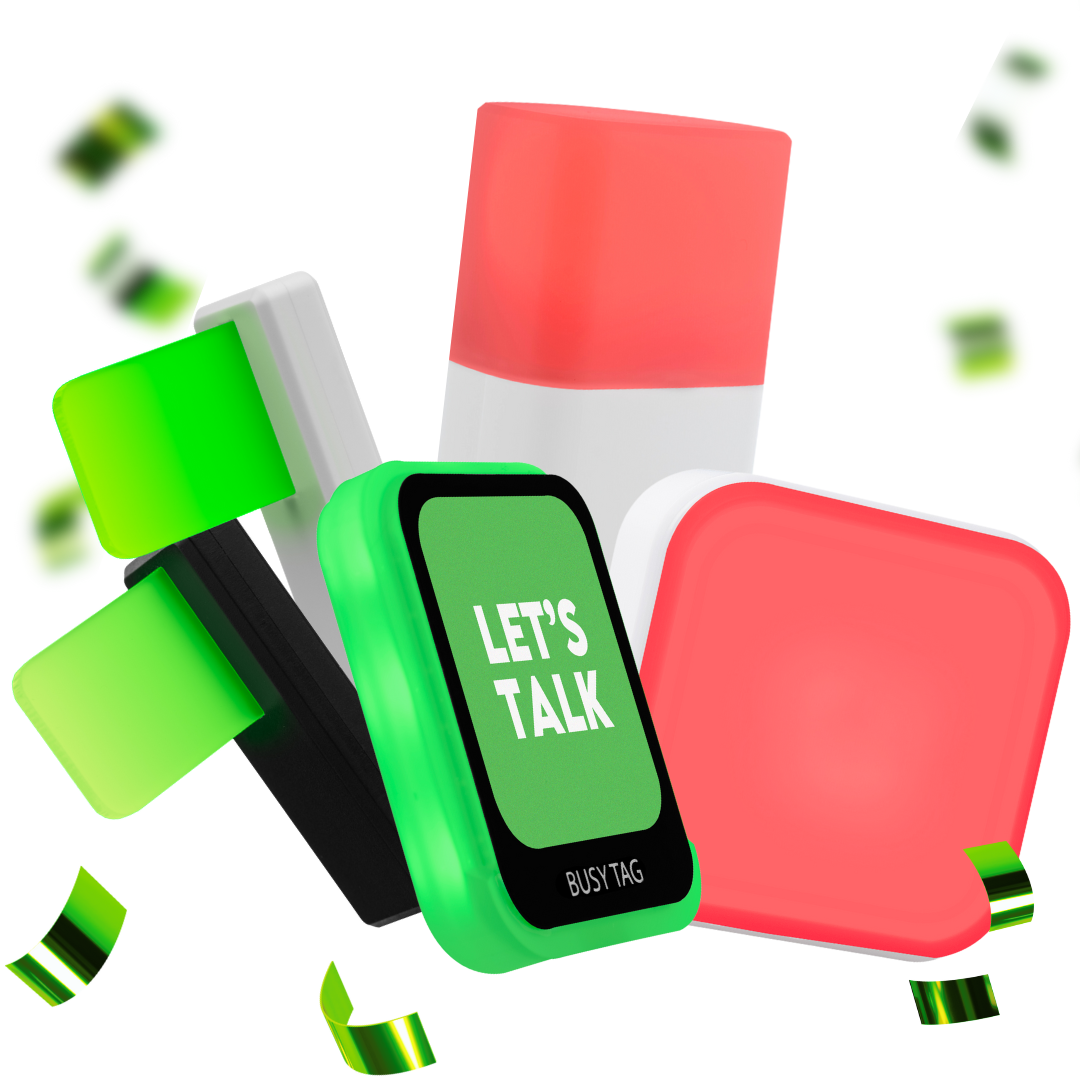

The Luxafor Switch Pro 2 is a wireless busy light you control with a small remote. The light is the Indicator (a Luxafor Bluetooth Pro) with a built-in battery. The remote is the Cube 2. You rotate the Cube 2 onto a different side, and the Indicator changes color, with no computer or app. This manual covers charging, mounting, setup, pairing, modes, the battery indicator and specifications.
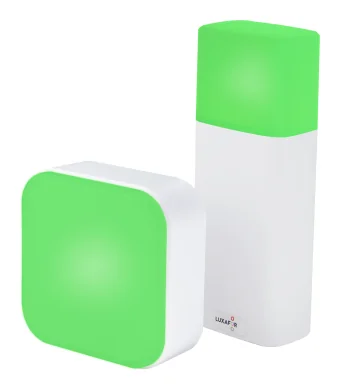
What’s in the box #
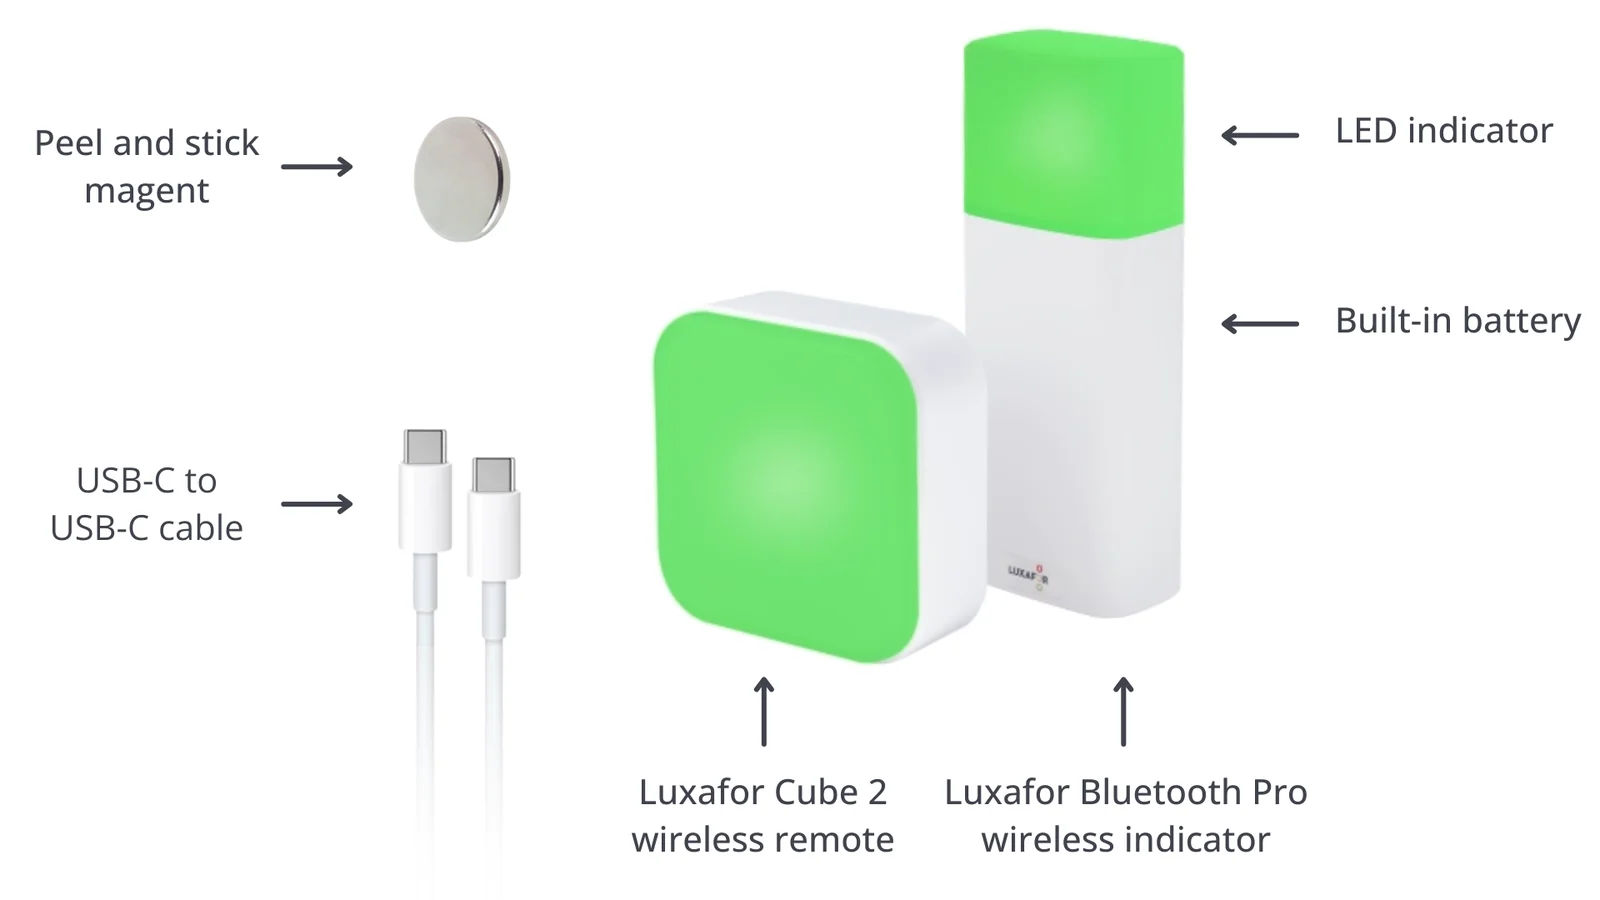
- 1 rechargeable Luxafor Indicator (Bluetooth Pro) with a built-in battery. This is the light.
- 1 Luxafor Cube 2. This is the remote.
- 1 USB-A to USB-C charging cable, 25 cm (10 in)
- 2 magnets with double-sided tape, for you to stick on the surfaces you choose
- 4 anti-slip pads for the Cube 2
A magnet is already built into the back of the Cube 2, and another is glued to the back of the Indicator. The anti-slip pads are not stuck on the Cube 2, so you can choose how to place it. See Place the Cube 2.
Get to know the Cube 2 #
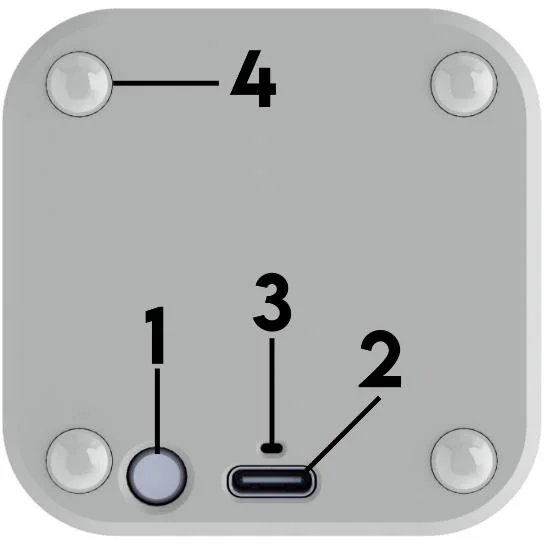
- Button. It turns the Cube 2 on and off, and switches between Eco Mode, Switch Mode and pairing.
- USB-C port for charging.
- Charging light, above the USB-C port.
- Anti-slip pads. They are optional. Stick one on each back corner.
Charge the Indicator and the Cube 2 #
Charge both units fully before the first use. The charging port of each unit is on the back.
- Plug the charging cable into a USB charger.
- Plug the other end into the Indicator or the Cube 2.
Indicator #
The light on the Indicator glows red while it charges and turns green when it is full. Charging takes about 3 to 5 hours.
Cube 2 #
Charging takes about 2 to 4 hours. If the Cube 2 is off, it turns on as soon as charging starts and shows the battery level. See Check the battery level. You can use the Cube 2 while it charges, and it works as usual.
If the battery is very low, the Cube 2 may not turn on right away. It charges for a short time first, then turns on and works as usual.
Mount the magnet #
A magnet holds the Indicator, or the Cube 2, on a wall, door or window. You can apply each magnet only once.
Choose the right surface #
The tape sticks only to smooth, even, firm surfaces that are not porous. On a rough or porous surface, the tape touches only a few points and the magnet does not hold.
Good surfaces:
- glass, such as windows, glass doors and glass partitions
- doors and furniture with a laminated, lacquered or painted finish
- smooth walls that are even, not porous, and smoothly painted or laminated
- clean, flat metal and glazed tiles
Surfaces to avoid:
- bare brick, concrete or stone, which are porous and uneven
- untreated wood, which is porous (sealed, varnished or painted wood works)
- textured plaster, wallpaper and fabric, which have a rough or loose top layer
- freshly painted or flaking walls (let new paint cure fully first)
Before you start #
- Clean the surface with rubbing alcohol or water and a soft cloth, then let it dry completely. Do not use cleaning agents, because they weaken the adhesive.
- Work at room temperature. Let the magnet warm up to room temperature first, which can take up to 3 hours. Do not install it below 10 °C (50 °F), because the adhesive does not bond in the cold.
- Choose the position carefully. If you remove the magnet and stick it on again, the adhesive weakens and the Indicator can fall.
Mounting steps #
- Mark the exact position. Then peel off the protective sheet without touching the tape.
- Place the magnet on the surface in one go, without sliding or repositioning it. Press firmly so the whole tape makes contact.
- Wait at least 30 minutes. The adhesive keeps getting stronger after you install it.
- Place the Indicator on the magnet. You can lift it off at any time to charge it, and the magnet stays on the wall.
| Time after mounting | What it means |
|---|---|
| 30 minutes | You can attach the Indicator |
| 24 hours | About 90% of final strength. Avoid knocking or pulling the Indicator. |
| 72 hours | Full strength |
On a plaster wall, make sure the surface is even and smooth. If the wall has been repainted several times, the tape can pull off the top layer of paint together with the magnet.
Do not re-stick a magnet that you removed, because it does not hold reliably. Damage from a fall and from sticking the magnet to an unsuitable surface is not covered by the warranty. See the warranty terms.
Set up #
- Charge the Indicator and the Cube 2 fully. They then work together, fully wireless.
- Mount a magnet where you want the Indicator. Without obstacles, the Bluetooth range is 80 m (250 ft).
- Press the button on the back of the Indicator once, briefly, to turn it on.
- Press the button on the back of the Cube 2 once, briefly, to turn it on.
- The Cube 2 connects to the closest Indicator by itself. A red running pattern shows that it is searching for a connection.
- Rotate the Cube 2 sideways to change the color of the Indicator.

Hold the Cube 2 in its natural position, with the charging port and the button at the bottom. It shows red. Turn it clockwise, and the next colors are blue, then yellow, then green.
Place the Cube 2 #
The Cube 2 comes without the anti-slip pads stuck on, so you choose how to place it.
- On a wall, doorframe or other vertical surface: mount a magnet in the same way as for the Indicator, and place the Cube 2 on it. Leave the anti-slip pads off.
- On a horizontal surface, such as a desk: stick the 4 anti-slip pads on the back corners of the Cube 2, then put it on a flat surface.
Connect the Cube 2 to another Indicator #
Press and hold the button on the back of the Cube 2 for 10 seconds, until it shows purple. Release the button. A purple pattern running clockwise shows that the Cube 2 is looking for a new Indicator nearby. The other Indicator must be on.
If the Cube 2 finds no Indicator in 90 seconds, it turns itself off. Press the button on the back to turn it on again, then wait up to 90 seconds for it to find an Indicator.
Turn the Switch Pro 2 off #
Press the button on the back of each unit once, briefly: the Indicator and the Cube 2.
Sleep Mode #
Lay the Cube 2 on its back, face up. It enters Sleep Mode. It is not off. It keeps the connection with the Indicator and is ready to use as soon as you stand it upright again.
Eco Mode #
Eco Mode makes the batteries last longer. In Eco Mode, the Indicator blinks slowly and the Cube 2 glows with a single LED.
- Press and hold the button on the back of the Cube 2.
- Release it when the Cube 2 turns yellow, after 2 to 3 seconds.
Do the same to turn Eco Mode off.
Switch Mode #
In Switch Mode, the Cube 2 controls the Indicator. When Switch Mode is off, the Cube 2 works on its own. It shows solid colors and does not change the color of the Indicator.
- Press and hold the button on the back of the Cube 2 for 3 to 5 seconds.
- Release it when the Cube 2 glows cyan.
- The Cube 2 looks for a nearby Indicator, which must be on. A circling red pattern shows that it is searching.
Do the same to leave Switch Mode. If the units do not connect, pair them again. See Connect the Cube 2 to another Indicator.
Button presses at a glance #
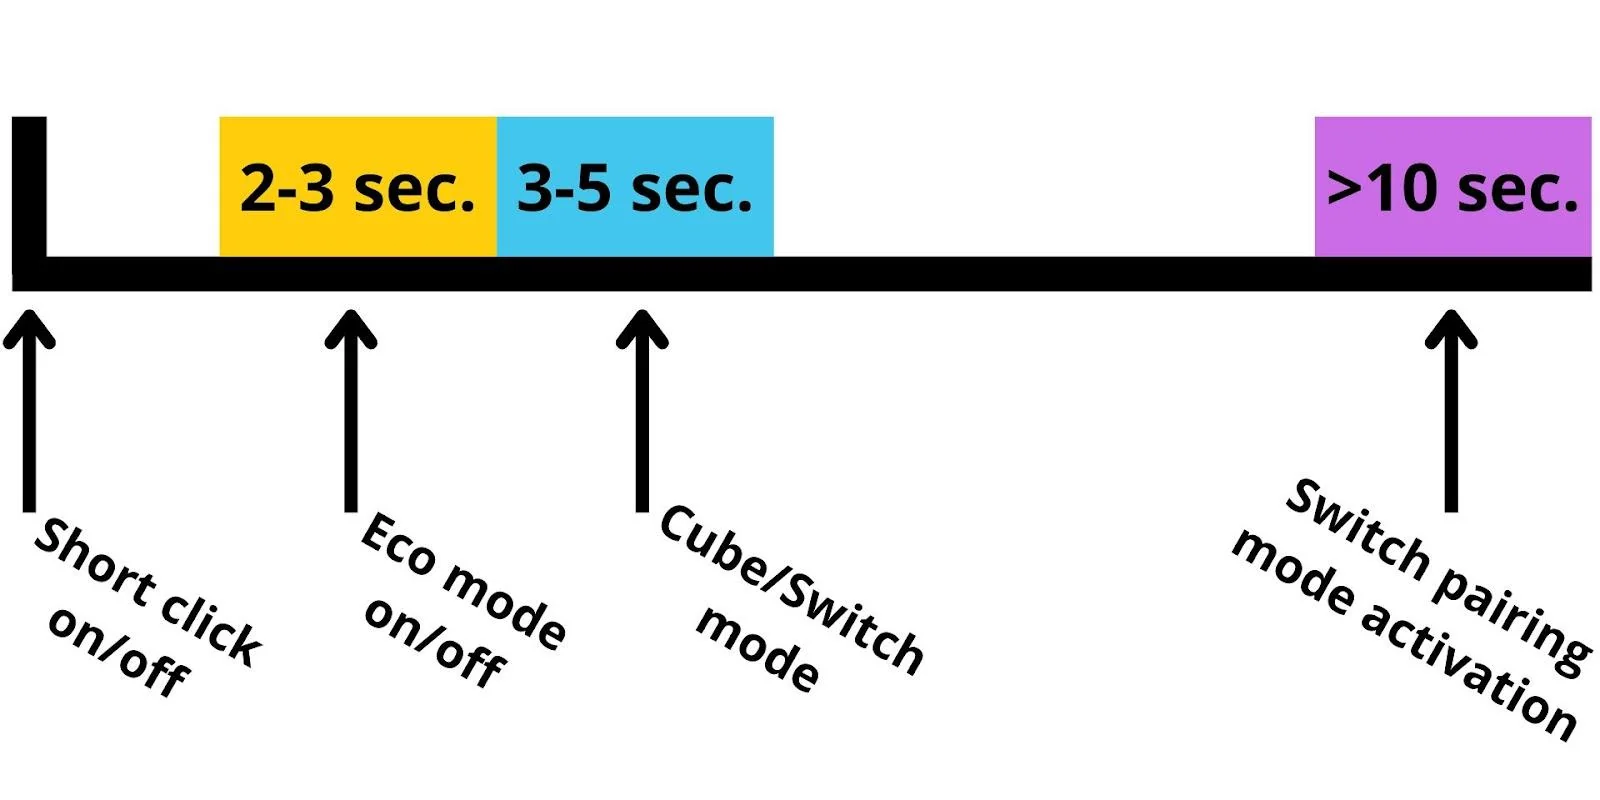
| How long you press | What it does |
|---|---|
| Short press | Turns the unit on or off |
| 2 to 3 seconds, until yellow | Turns Eco Mode on or off |
| 3 to 5 seconds, until cyan | Switches between Switch Mode and Cube mode |
| 10 seconds or more, until purple | Starts pairing with another Indicator |
Check the battery level #
Lay the Cube 2 on its back, face up. It shows a solid blue color, and the number of LEDs that shine tells you how much battery is left. The Cube 2 also shows the battery level when you turn it on.
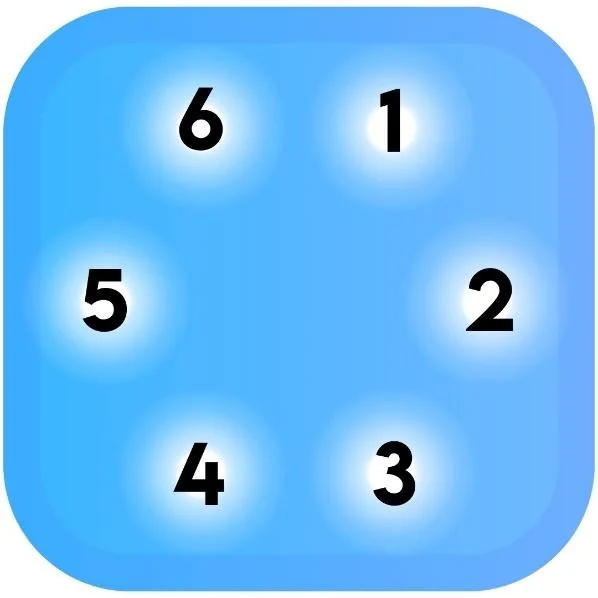
- All 6 LEDs shine: the battery is full.
- As the battery drains, the LEDs go out one by one. They start with LED 1 and go clockwise.
- Only LED 6 shines: the battery is almost empty. Charge the Cube 2 right away.
What the lights mean #
| Light | Meaning |
|---|---|
| Blue, with some LEDs shining | You placed the Cube 2 face up, and the LEDs show the battery level |
| Yellow | You are holding the button. Release it to turn Eco Mode on or off. |
| Cyan (light blue) | You are holding the button. Release it to switch between Switch Mode and Cube mode. |
| Red running pattern | The Cube 2 is searching for an Indicator |
| Purple | You are holding the button. Release it to search for a new Indicator. |
| Purple running pattern | The Cube 2 is searching for a new connection, or has started to connect and is reading the device information and battery level |
| Red light on the Indicator while charging | The Indicator is charging |
| Green light on the Indicator while charging | The Indicator is full |
Control the Indicator from your iPhone #
The Indicator is a Luxafor Bluetooth Pro, so you can also control it from the Luxafor app and the iPhone Shortcuts app. Turn the Cube 2 off first with a short press of the button on its back. Then follow the steps in Use iPhone Shortcuts in the Bluetooth Pro manual.
Technical specifications #
Indicator (Bluetooth Pro) #
| Specification | Value |
|---|---|
| Dimensions | 98 × 37 × 22 mm (3.85 × 1.45 × 0.86 in) |
| Weight | 75 g |
| Light | 2 RGB LEDs |
| Power consumption | Up to 80 mA |
| Radio | Bluetooth 5.2 with LE Coded PHY |
| Battery | Built-in, 2600 mAh |
| Battery life | 80 hours to 12 months, depending on brightness and mode |
| Charging | USB-C port, with the USB-A to USB-C cable (included) |
Cube 2 (remote) #
| Specification | Value |
|---|---|
| Dimensions | 56 × 56 × 26 mm (2.20 × 2.20 × 1.02 in) |
| Weight | 68 g |
| Light | 6 RGB LEDs |
| Power consumption | Up to 26 mA |
| Range | Up to 80 m (250 ft) without obstacles |
| Battery | Built-in, 1200 mAh |
| Battery life | 46 to 90 hours of non-stop use |
| Battery life in yellow | 46 hours, or 58 hours in Eco Mode |
| Battery life in green, red or blue | 73 hours, or 90 hours in Eco Mode |
| Charging | USB-C port, with the USB-A to USB-C cable (included) |
Troubleshooting #
The Cube 2 does not connect to the Indicator #
- Check that the Indicator is on.
- Check that the Cube 2 is in Switch Mode. See Switch Mode.
- Pair them again. See Connect the Cube 2 to another Indicator.
The Cube 2 turned off by itself #
The Cube 2 turns itself off if it finds no Indicator in 90 seconds. Turn on the Indicator, then press the button on the Cube 2 to turn it on again.
The Cube 2 does not turn on while charging #
If the battery is very low, the Cube 2 charges for a short time before it turns on. Leave it connected to the charger.
The Indicator fell off the wall #
The magnet tape holds only on smooth, clean surfaces. See Choose the right surface. A magnet that you removed does not hold reliably when you stick it on again.
Still need help? #
Send us a message and tell us:
- which device you have and where you bought it
- what you see, and what you expected to see
- which steps on this page you have already tried
- your order number, if you have one
A short video or photo of the problem helps us fix it faster. If the problem is with the connection, film the Cube 2 and the Indicator while they try to connect.