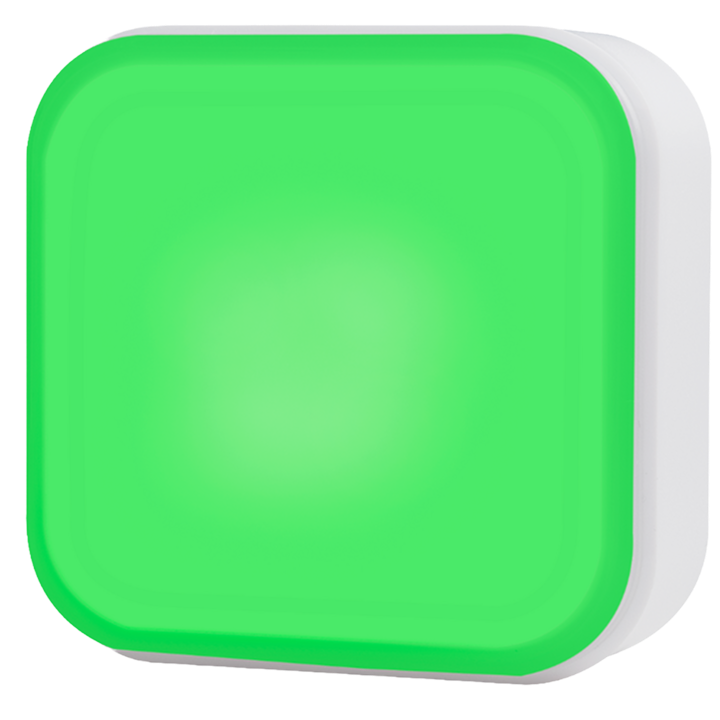
The Luxafor Cube 2 is a wireless busy light with a built-in battery. You change your status by turning it onto a different side. This manual covers setup, charging, modes and specifications.
What’s in the box #
- 1 Luxafor Cube 2, with a magnet built into its back
- 1 USB-A to USB-C charging cable, 25 cm (10 in)
- 1 magnet with double-sided tape, for you to stick on a surface you choose
- 4 anti-slip pads
The anti-slip pads are not stuck on the Cube 2, so you can choose how to place it. Use the magnet on a wall or on a surface where you do not use the pads, and use the pads on a desk. See
Set up.
Get to know your Cube 2 #
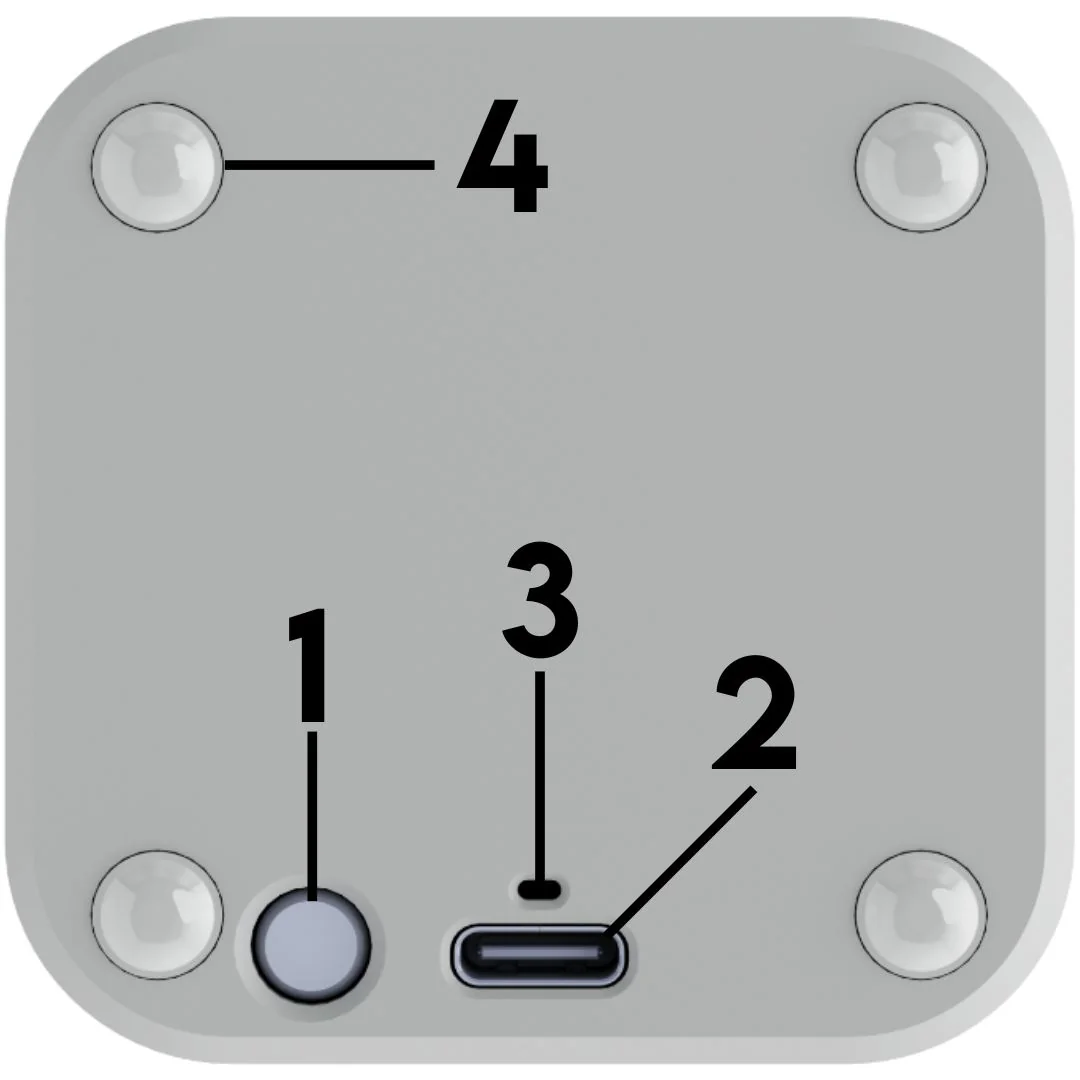
| Number |
Part |
What it does |
| 1 |
Button |
Turns the Cube 2 on and off, and switches modes |
| 2 |
USB-C port |
Charges the Cube 2 |
| 3 |
Charging indicator |
Shows the charging state, above the USB-C port |
| 4 |
Anti-slip pads |
Keep the Cube 2 in place on a desk. Stick one on each corner. |
Charge the Cube 2 #
- Charge the Cube 2 fully before the first use.
- Plug the USB charging cable into a USB charger.
- Plug the other end into the USB-C port on the back of the Cube 2. The charging indicator blinks red.
- Wait until the charging indicator turns green. The Cube 2 is full.
You can use the Cube 2 while it charges. If it is off, it turns on when charging starts.
Note: If the battery is empty, the Cube 2 may stay off at first. It charges for a short time, then turns on by itself.
Set up #
Choose how you want to place the Cube 2.
Place it on a desk #
- Take the 4 anti-slip pads from the box.
- Stick one pad on each corner of the back of the Cube 2.
- Put the Cube 2 on a desk or any other flat surface.
Place it with the magnet #
The Cube 2 has a magnet built into its back. Use the magnet from the box to place the Cube 2 on a wall, desk or workstation. Leave the anti-slip pads off.
- Remove the plastic from the double-sided tape on the magnet.
- Stick the magnet on the surface where you want the Cube 2.
- Attach the Cube 2 to the magnet.
Use a dry, clean and smooth surface. The magnet holds better there. You can stick the magnet only once. For the surfaces to avoid and the mounting times, see
Mount the magnet in the Switch Pro 2 manual.
Turn it on #
- Press the button on the back once, briefly.
Use the Cube 2 #
Change the color #
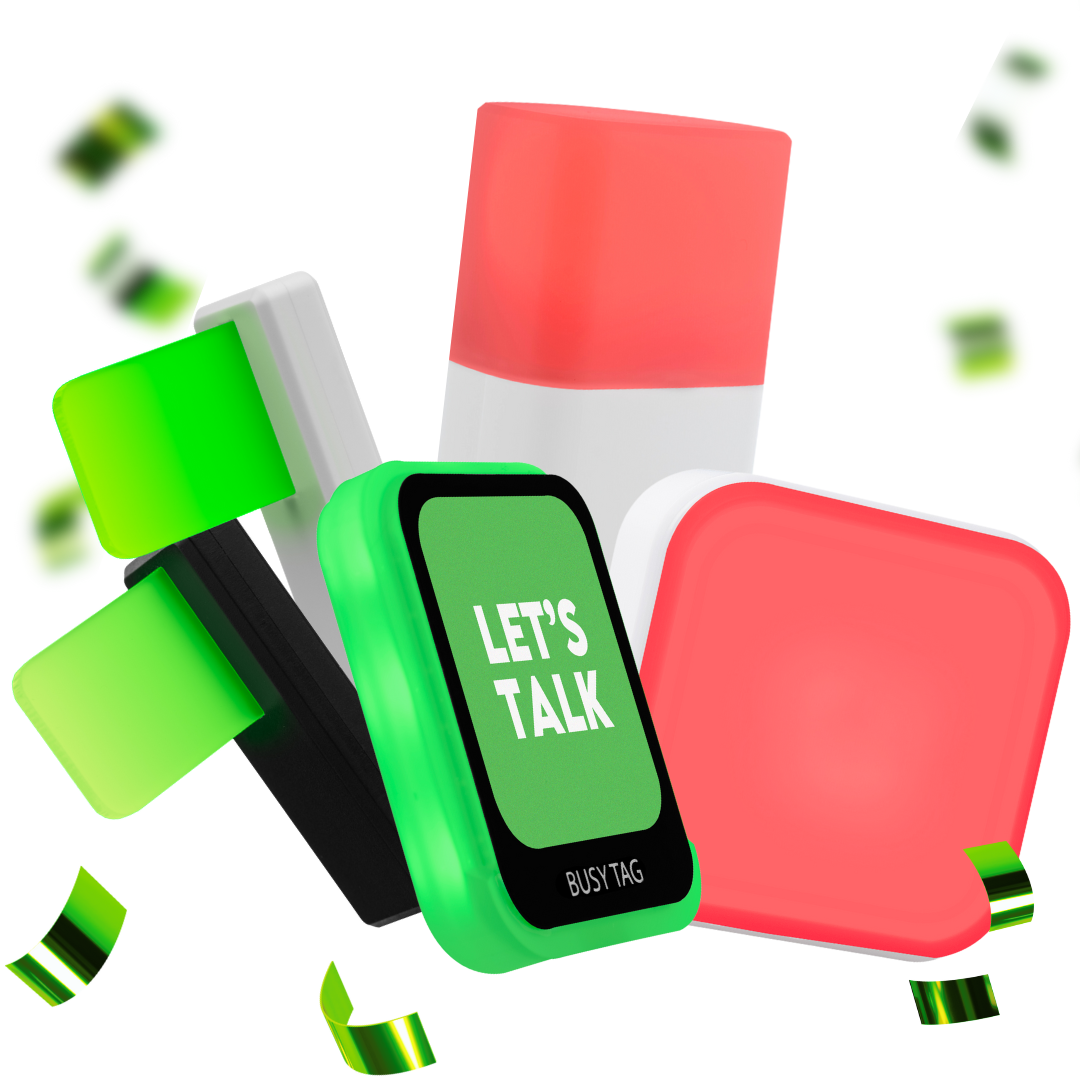
Turn the Cube 2 onto a different side to change the color. The picture shows four colors: green, red, yellow and blue.

Hold the Cube 2 in its natural position, with the charging port and the button at the bottom. It shows red. Turn it clockwise, and the next colors are blue, then yellow, then green.
Turn it off #
- Press the button on the back once, briefly.
- Release the button when the LEDs go out.
Sleep mode #
Lay the Cube 2 face up. It does not turn off. It goes into Sleep mode and lights up again when you stand it upright. Blue lights flash for a short time when you lay it down.
Eco mode #
Eco mode makes the battery last longer. The Cube 2 uses 1 LED instead of 6, which saves energy. See
Technical specifications for the battery life.
- Hold the button on the back for 2 to 3 seconds.
- Release the button when the Cube 2 turns yellow. Eco mode is on.
To turn Eco mode off, hold the button again for 2 seconds.
Check the battery level #
- Lay the Cube 2 face up. The LEDs light up cyan.
- Count the lit LEDs. More LEDs means more charge.
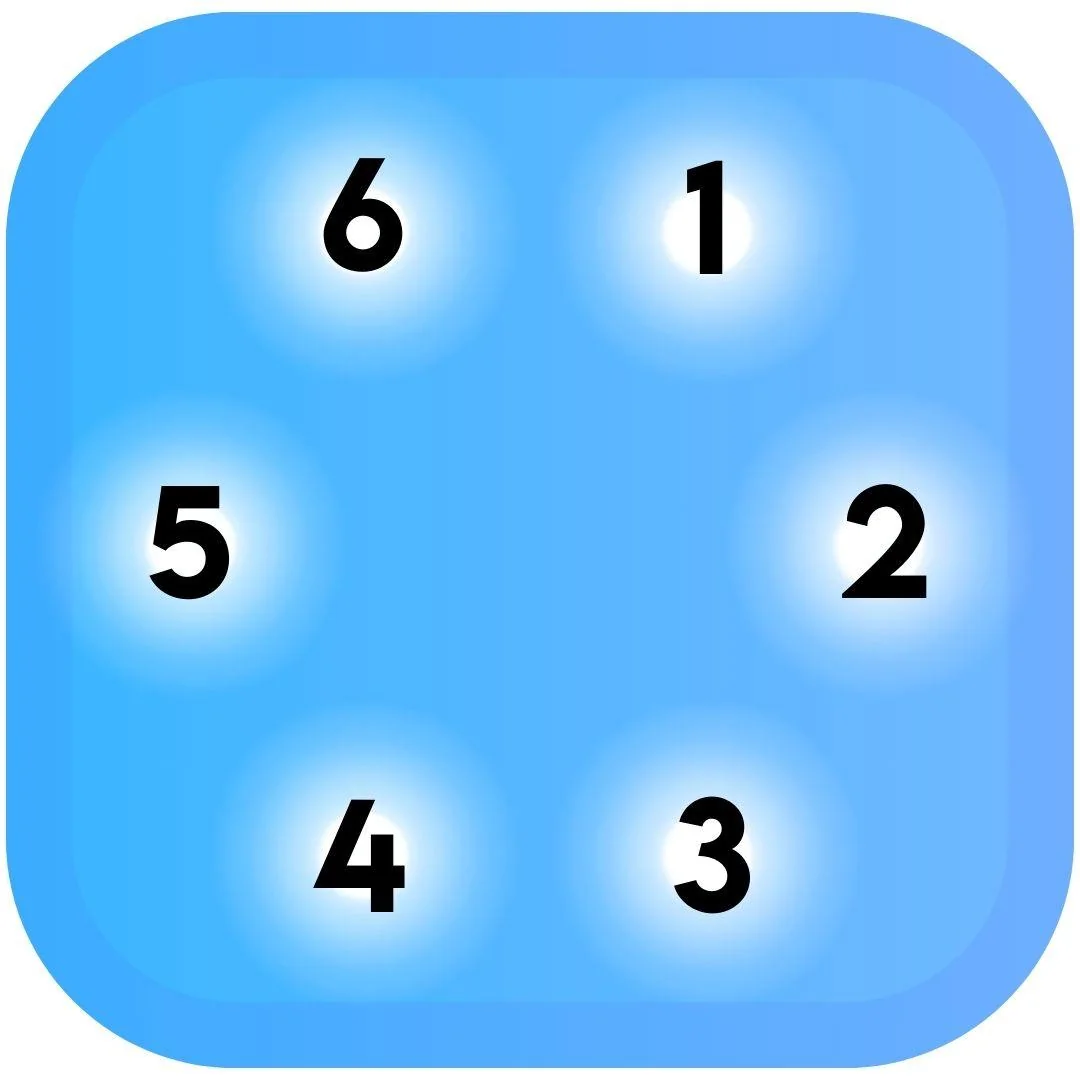
- All 6 LEDs lit: the battery is full.
- The LEDs go out one by one as the battery drains, starting with LED 1 and going clockwise.
- Only LED 6 lit (upper left): the battery is almost empty. Charge the Cube 2 now.
Button guide #
The button on the back does different things depending on how long you hold it.
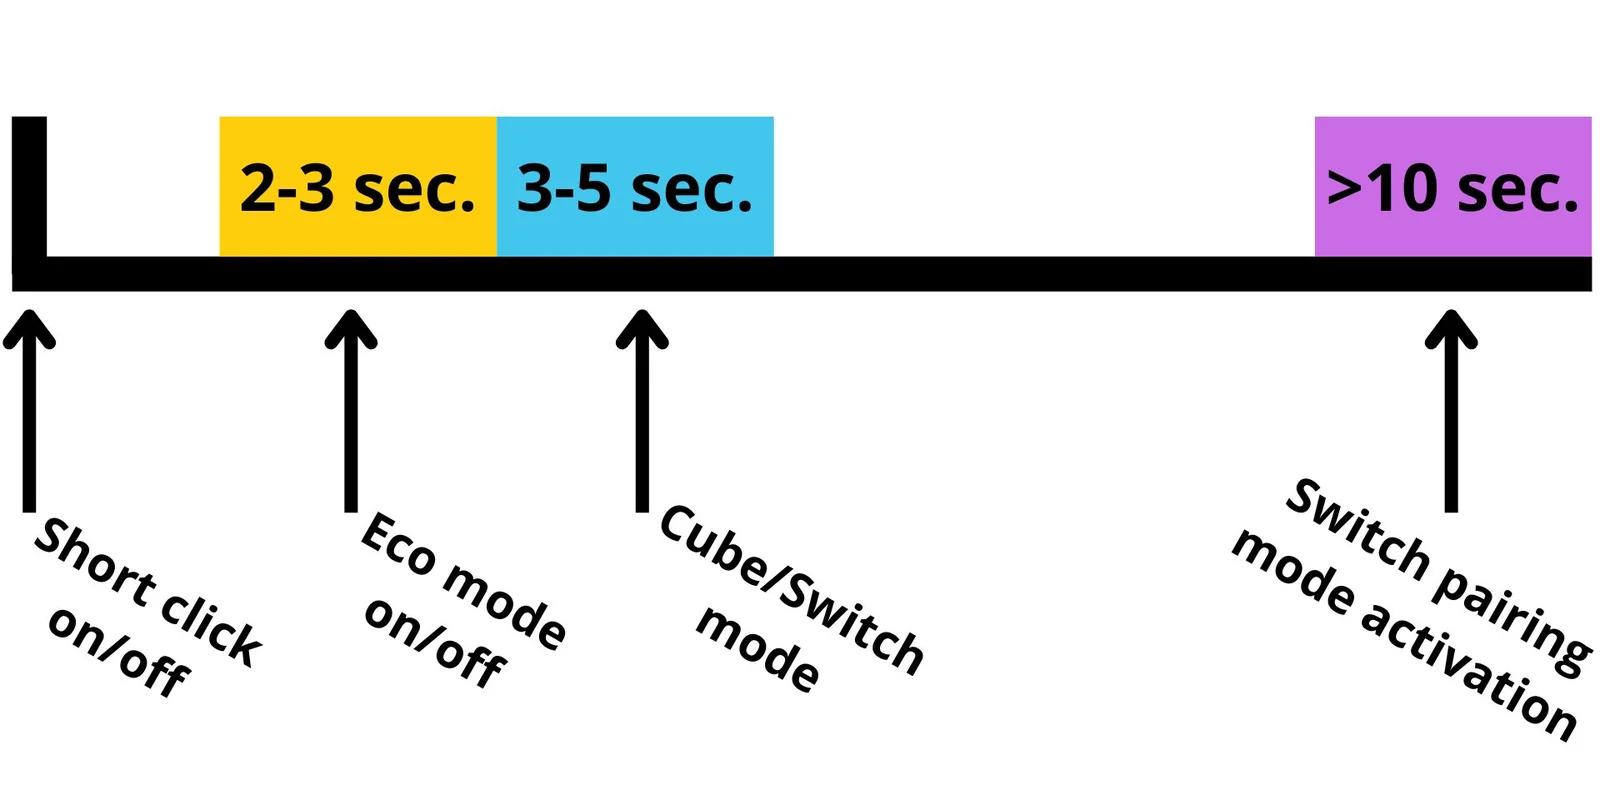
| How long you hold |
What happens |
| Short click |
Turns the Cube 2 on or off |
| 2 to 3 seconds |
Turns Eco mode on or off (yellow) |
| 3 to 5 seconds |
Switches between Cube mode and Switch mode (cyan) |
| More than 10 seconds |
Starts Switch pairing (purple) |
Switch mode #
The Cube 2 works on its own in Cube mode, with solid colors. In Switch mode, it connects to a Luxafor Bluetooth Pro, or to an older-generation Luxafor Bluetooth device, and works as its remote control. A Cube 2 with a Bluetooth Pro is the Luxafor Switch Pro 2. See the
Luxafor Switch Pro 2 manual.
The range depends on the device you pair with. The Cube 2 reaches up to 80 m (262 ft), and the Bluetooth Pro reaches up to 25 m (82 ft).
Turn on Switch mode #
- Turn on the Luxafor Bluetooth device.
- Hold the button on the Cube 2 for about 3 seconds, until the Cube 2 turns cyan.
- Release the button. The Cube 2 pulses red and runs red clockwise. It is looking for the Bluetooth device.
To go back to Cube mode, hold the button for 3 to 5 seconds until the Cube 2 turns cyan again.
Pair with a new device #
Use these steps if the Cube 2 and the Bluetooth device do not connect.
- Hold the button on the Cube 2 for about 10 seconds, until the Cube 2 turns purple.
- Release the button. The purple light runs clockwise. The Cube 2 is looking for a new Luxafor Bluetooth device.
What the colors mean #
| Indicator |
Meaning |
| Blue, flashing |
You laid the Cube 2 face up (Sleep mode) |
| Yellow |
You held the button to turn Eco mode on or off |
| Cyan |
You held the button to switch between Cube mode and Switch mode. Also shows the battery level when the Cube 2 is face up. |
| Red, running clockwise |
Switch mode: looking for the Bluetooth device it was connected to |
| Purple, running clockwise |
Switch mode: looking for a new Bluetooth device |
| Charging indicator, blinking red |
Charging |
| Charging indicator, green |
Fully charged |
Technical specifications #
| Specification |
Value |
| Dimensions |
56 × 56 × 26 mm (2.20 × 2.20 × 1.02 in) |
| Weight |
68 g |
| Light |
6 RGB LEDs |
| Connection |
Bluetooth |
| Range |
Up to 80 m (262 ft) without obstacles |
| Battery |
Built-in, 1200 mAh |
| Charging |
USB-C port, with the USB-A to USB-C cable (included) |
| Power consumption |
Up to 26 mA |
Battery life #
Battery life with non-stop use depends on the color and on Eco mode.
| Color |
Normal |
Eco mode |
| Yellow |
46 hours |
58 hours |
| Green, red or blue |
73 hours |
90 hours |
Still need help? #
Send us a message and tell us:
- which device you have and where you bought it
- what you see, and what you expected to see
- which steps on this page you have already tried
- your order number, if you have one
A short video or photo of the problem helps us fix it faster. If the problem is with the connection, film the device at the moment it tries to connect.